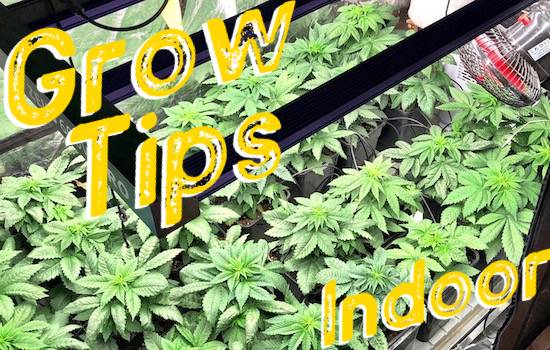
Growing cannabis indoors – A complete growguide
Indoor Growing Tutorial – The request for a complete guide to cannabis cultivation is probably the most requested thing in our grow shop. For this reason, we have decided to summarize all the important requirements for growing cannabis indoors, including light, ventilation, fertilizers and everything you should know about growing cannabis indoors!
So you ask, how to grow cannabis indoors?
The request for a complete guide to cannabis cultivation is probably the most requested thing in our grow shop. For this reason, we have decided to summarize all the important requirements for growing cannabis.
Of course, we have to differentiate between indoor and outdoor cultivation. In this “Grow guide” we would like to focus exclusively on indoor cannabis cultivation. When growing indoors, there are more factors to consider, since natural conditions such as sunlight, the right climate, etc. must be provided artificially. The big advantage is that we are not dependent on Mother Nature. We can produce a crop of the same quality all year round no matter when or where!
Indoor Cannabis cultivation, the prerequisites:

Important requirements for indoor hemp cultivation are for example; a suitable place, the right light, quality of the soil, irrigation, and ventilation. We will also point out all the necessary utensils to grow cannabis indoors. Our goal is to pave the way for beginners in cannabis cultivation to a successful harvest. Again and again, we encounter disappointed faces in the grow shop, who have invested a lot of time and work into their grow, and still did not have a successful harvest. Often the lack of basic knowledge is responsible for this.
However, all the tips from our experiences should help even experienced growers to improve conditions here and there!
What is needed for indoor growing? | The shopping list before you start:
- Grow tent
- Lighting system
- Ventilation and de-aeration
- Measuring devices for humidity and temperature
- Measuring devices for pH-value and EC-value
- Substrates and fertilizers
- Suitable number and size of pots (small approx. 0,3l & large approx. 7l – 11l)
- Good seeds
- Insecticides
Let’s start with our guide to grow cannabis indoors!
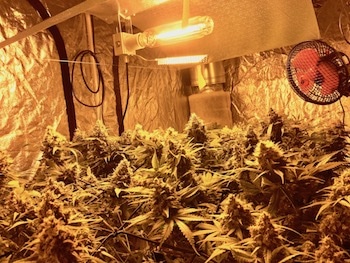
1. Grow Room or Grow Tent?
On one hand, there is the possibility of preparing a whole room for cannabis cultivation. However, building a grow room is quite expensive. In addition, not everyone has a spare room available for this purpose. For this reason, we recommend simply buying a grow tent or grow box and using it instead! This is the easiest way to create a self-sufficient system. In this system, factors such as lighting, ventilation, and irrigation are adjusted to create ideal growing conditions. Also, the odor generated during cannabis cultivation should be isolated to the outside.
So, where should I set up my grow tent?
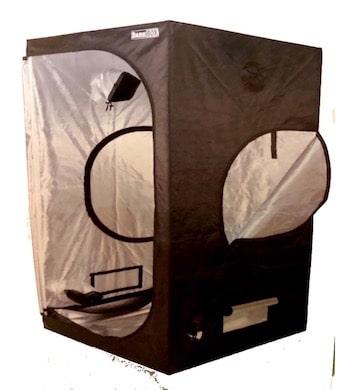
The place where the cultivation tent, also called grow box or grow tent, should be set up, should meet certain requirements. We would like to briefly discuss these requirements:
The room in which the grow tent is to be set up should in any case have the possibility to set up ventilation to the outside. Ideally, an air shaft or a window hatch. This is the prerequisite for the installation of a ventilation system, which will be needed later. Furthermore, there should be a reliable power source. In other words, a working electrical outlet. In addition, it is important that the room in which the grow box will be located should be dry and germ-free. Damp basement rooms with mold on the walls are therefore rather unsuitable or would have to be processed accordingly beforehand.
Once a suitable place for the grow tent has been decided, it must be equipped with the necessary technology. In the following part, we would like to go into more detail about all the technical components as well as the necessary utensils. The grow project can only begin once the grow tent is set up and equipped. We will start with the first technical component, the lighting.
Growing cannabis indoors
2. What lighting to use for indoor cultivation?
To be able to produce optimal lighting for cannabis plants, it is important to understand the difference between the red and blue spectral ranges. The blue spectral range is produced in nature by the spring sun. Due to the position of the sun and the refraction of light in the atmosphere, the light from the spring sun differs from the light from the sun in mid-summer.
The blue spectral range primarily promotes the growth of a plant.
The red spectral range, in turn, particularly supports flowering.
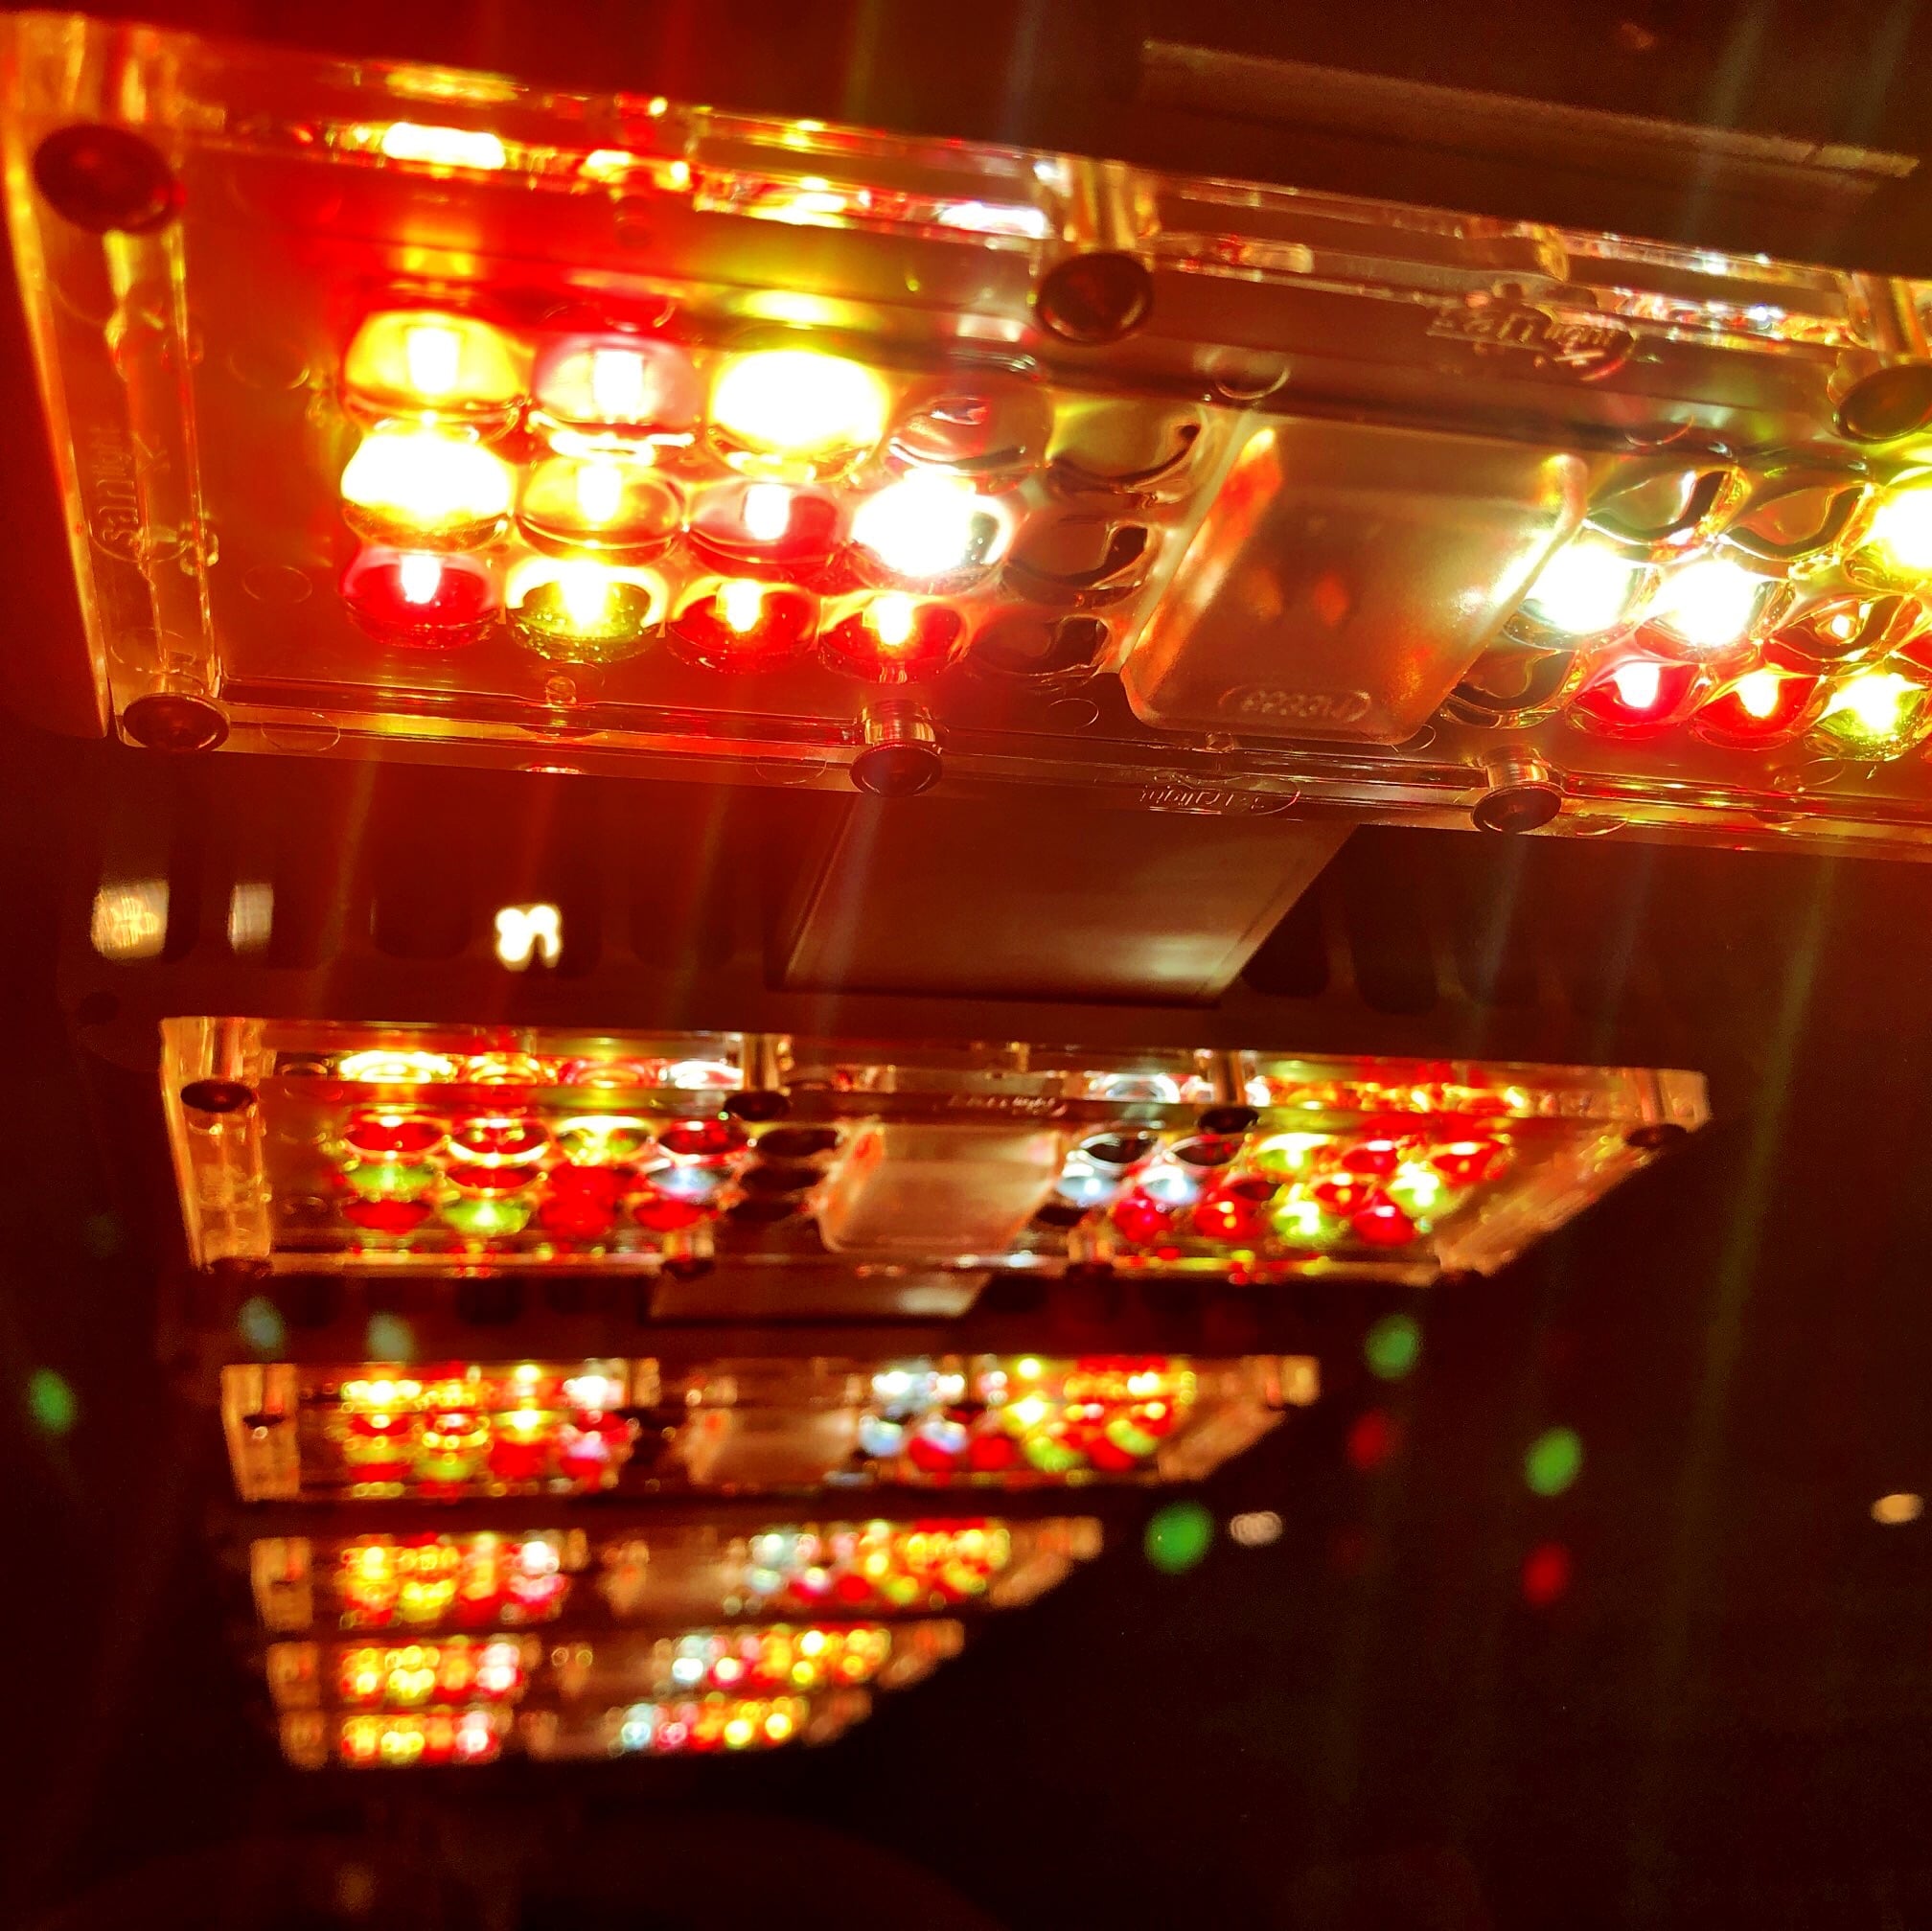
For cannabis cultivation under optimal conditions, this is a very important aspect. To be able to perfectly simulate Mother Nature, there are two possibilities; There are lamps that cover the entire color spectrum. LED panels perform this task. Alternatively, two different lamps can be used for the respective color temperature, red or blue. The color temperature, meaning the color spectrum measured in Kelvin (K).
Metal halide lamps (MHL) are used for the growth phase. They emit white, colder light at about 5000K – 7000K. Sodium vapor lamps (NDL) take over the illumination during the flowering phase. Their light radiates midsummer warm at approx. 2500K – 3500K. Both light sources are also available as energy-saving lamps. The most common lamp is an NDL Grow & Flow, which combines both spectra.
Another key figure that is relevant for the correct lighting in cannabis cultivation is light intensity. It is measured in lumens and in this case, indicates how brightly a lamp shines.

During the growth phase, the value of 30,000 lumens/m² should be observed. For the flowering period, the value for optimal yield is about 50,000 lumens/m². Both values should not be undercut, as it would negatively affect the yields!
The differences in brightness can not be detected by the human eye cannabis cultivation indoor – lighting. For this reason, when buying a lamp, it is important to make sure that it is a trustworthy manufacturer. A good grow shop also offers its customers the possibility to test the lamps. However, a lux meter is mainly to check whether already used lamps still provide enough light intensity for a grow operation. Small tip: The lamps should never be touched with bare hands on the glass because the fats on your skin could negatively affect the performance.
In this article, you will find a power cost calculator to accurately calculate your power consumption for indoor growing!
Last but not least, there is also the question of how much power is needed for which cultivation area. There are various rules of thumb for this. However, there is not only the question of the appropriate lamp but also which reflector should be used.
Growing cannabis indoors
3. The right ventilation and venting

We had already mentioned that we must try to replicate the conditions of the great outdoors as closely as possible. This, of course, includes the winds to which the hemp plant would be exposed in the outdoor area. A good supply of fresh air is no less important for the plants than it is for us humans.
The heat generated by the lamps is also compensated for by ventilation. In the grow tent, this task is performed by a simple air-in-take duct that supplies the room with fresh air from the outside. To prevent pests from entering the grow tent in this way, we recommend appropriate protection. This can be, for example, a nylon pantyhose off your mom, which is simply pulled over the air inlet spigot.
However, a simple air-in-take is not sufficient for adequate air circulation in the tent. Depending on the size of the tent, at least one additional fan with a swivel head should be installed. The already mentioned winds, avoid typical asparagus style growth of the plant and provide more stability. Also, the risk of mold growth is reduced on this.

Somewhat more complex than the issue of supply air and recirculation is the matter of extracting the already stale air. After fresh air has been supplied, the stale air must of course be removed again. At the same time, the exhaust ventilation ensures the regulation of the climate inside the grow tent. The additional use of an activated carbon filter is recommended, as it prevents the spread of the pleasant cannabis odors outside the grow tent.
The output of the exhaust fan must match the size of the grow tent to avoid possible overheating or negative pressure. Since additional parts such as activated carbon filters or ventilation hose inhibit the performance of the fan, it is important to take this into account in the calculation. For the power reduction of the carbon filter, add 35% of the room volume. The same applies to the air hose. Here, 1m³ is added per linear meter.
This formula can be used to calculate the correct extraction fan for the grow box:
In our example, the grow tent measures 1m x 2m x 2m and we use a 2m long ventilation hose:
Formula: (room volume + allowance for activated carbon filter + allowance for air hose) x 55.
Important: From a room volume of 8m³, the multiplier 55 must be replaced by 22!!!
So, let’s first calculate the room volume of our grow box:
Length x width x height: 1m x 2m x 2m = 4m³
Then we determine the allowance for the activated carbon filter:
4m³ x 0.35 = 1.4m³.
So, taking into account the 2-meter long air hose, we get the following formula:
(4m³ + 1.4m³ + 2m³) x 55 = 407.00m³/h
This means that the fan should have a capacity of at least 400m³ – 450m³ per hour. The choice of a suitable activated carbon filter should also be based on this measure. This should have a little more power than the fan. In our example an activated carbon filter of approx. 500 m3/h would be the suitable one.
If you don’t want to enter the individual calculation steps into your calculator, you can simply use this calculator:
Attention, please note that the calculation is based on a grow box/room with one 600 watt lamp. If more lamps are used, the power of the exhaust fan must be adjusted upwards.
Cannabis cultivation indoor – Cooltube

If a sodium vapor lamp (has the strongest heat development) is used for lighting, the use of a Cooltube is recommended. Here, the discharged air simultaneously ensures the cooling of the lamp.
4. Air, temperature, and climate | What are the perfect conditions?
We would like to break down the optimal temperature and humidity for indoor cultivation of cannabis plants into four cycles of maturity, as climate conditions should vary slightly depending on the stage of growth.
1) The germination phase:
During the germination phase, or even with freshly cut clones, the root system is not yet particularly developed. For this reason, the plant absorbs most of its water needs through the foliage. Depending on the plant species, the germination phase is completed after about 10 to 14 days. For this period we recommend a humidity of 65% – 70%. The air temperature should be between 20 and 25 degrees during the lighting period.
2) The vegetative phase:
During the vegetative phase, the humidity should be lowered by 5% per week. Until it settles at 40% – 70%. The air temperature may be increased to 28 degrees during this time since the leaves give off evaporative cooling due to the better-developed root system. The duration of the growth phase is determined by the grower. On average, it is about two to six weeks. This also depends on the plant species, for example, sativas should be sent into flowering a little earlier.
3) The flowering phase:
The flowering phase is initiated by the grower, as mentioned earlier. This is done by shortening the light cycle from 18 to 12 hours. Since by now, very dense foliage should have formed, and the plant begins to form buds, it is important to avoid the development of mold and pest infestation. This is achieved by lowering the humidity to 40% – 50% and regulating the temperature to 20 – 26. The duration of the ideal flowering period should be found in the product information of the purchased seeds.
4) Late flowering:
We refer to the last 1 – 2 weeks before harvest as late flowering. In this phase, the risk of mold (botrytis) in the flower heads, or buds, is particularly high. For this reason, the humidity must be reduced to a minimum. Ideally between 30% and 40%. The temperature should be 18-24 degrees with the lights on.
5. What is the best soil for cannabis cultivation?
Certainly, other substrates are also suitable for cannabis cultivation, such as coco, Rockwool, or even expanded clay. However, we would like to focus on the most common of all substrates first, namely good old soil.
We want to make it our goal to provide our plants with the optimal nutrient medium. We will go into great depth on the individual factors that need to be considered here.
What are our requirements for good soil?
- The soil should have good drainage
- The density of the soil must provide sufficient space for the root system to develop
- A good CO2 exchange of the soil is very important
- A balanced nutrient ratio must be present
Let’s elaborate
First, let’s start with drainage: without delving too deeply into geoscience, we need to briefly look at the not-so-familiar word perlite. Perlite is a type of rock that expands immensely when heated to high temperatures. The result is a firm, foam-like texture that does not retain moisture. Perlite prevents the soil from becoming too compacted, ensuring ideal drainage. This also allows nutrients to reach our plant’s root system more easily.
Since we have already dealt with the second point, namely the density, it only remains to mention here that when filling the pots, attention must be paid to an appropriate density. But how exactly is this determined? Well, all that can be said is that the soil should not be pressed too tightly in any case. However, if you just pour it into the pot, after a few waterings you will find that the pot is only half full. We would like to avoid both of these scenarios.
A good substrate is characterized by the number of microorganisms. Microorganisms are tiny organisms that provide CO2 production through their farts.
Regarding the nutrient ratio, it should be noted that only a weak nutrient content is required in the germination phase. We had already described this in our article on how to germinate cannabis seeds. Therefore, in the germination phase, a light mix is the right choice. As soon as the plant enters the vegetative phase, a substrate with a higher nutrient ratio is recommended.
6. The water to be used for cannabis cultivation:
There is no life without water! High-quality water is crucial for the healthy growth of our plants.
In order to continuously provide our little ones with quality water, we need to look at the PH value and the EC value.
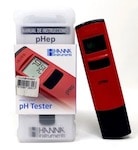
The pH determines the acid/base balance of e.g. liquids. On a scale from 0 to 14, it indicates how acidic or alkaline a liquid is. Here, values of 0 – 6.5 are to be assessed as acidic. The golden midpoint, i.e. 7, is considered neutral. Pure water has this value. All values above 7 are defined as basic or alkaline. The optimal PH value for indoor cannabis cultivation is between 5.8 and 6.2.
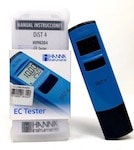
The EC value indicates the electrical conductivity of the water or a solution. This value is measured in Siemens per meter (S/m). Most measuring devices will show us the value in micro siemens per centimeter (mS/cm). The values of interest to us indoor growers are in the range of 0 to 3.0.
The optimal EC value varies during the growing process. In addition, different optimum values apply in part for individual fertilizer manufacturers. Especially the experience of the grower is required. The pH value, on the other hand, must be adapted to the substrate used. In the complete cultivation cycle, we distinguish between the four phases already described above.
| Cultivation Stages | Week 1 | Week 2 | Week 3 | Week 4 | Week 5 | Week 6 | Week 7* | Week 8 | Week 9 | Week 10 | Week 11 | Week 12 |
|---|---|---|---|---|---|---|---|---|---|---|---|---|
| Germination/Seedling Stage | ~ 0,8 | |||||||||||
| Vegetative Growth | ~ 1,0 | ~ 1,1 | ~ 1,3-1,5 | |||||||||
| Flowering | ~ 1,8 | ~ 1,8 | ~ 1,8 | ~ 2,0 | ~ 2,2 | |||||||
| Late Flowering | ~ 2,1 | ~ 2,0 | Flushing* |
Flushing* = Flushing is the cleaning of the root system of the plant without the addition of nutrients.
Week 7* = For a longer flowering stage, e.g. 63 days or 70 days, repeats each week 7.
The values recommended by us are comparatively conservative, which can be approx. 30% – 40% higher in the high-performance phase.
7. What fertilizers to use for indoor growing:
When applying fertilizers, we distinguish between organic and mineral fertilizers. The subject of plant fertilization is extremely extensive, so for now we would like to talk only about the necessary basis. The following nutrients and vitamins need to be included in every fertilizer shelf:
- Root stimulator
- NPK fertilizer (growth)
- NPK fertilizer (flowering)
- PK booster (Important: Limit to one product, do not mix different ones)
These four basic fertilizers alone will allow for a high-yielding crop!
Most fertilizer manufacturers offer starter kits containing all the necessary fertilizers for the complete grow.
On the subject of fertilizing, the following applies in general; If the foliage becomes lighter in color, the fertilizer dose must be increased. If it turns dark, the fertilization should be lowered. Also, the erection of the leaf edges is a clear sign of overfertilization.
The applied fertilizer quantities should always be recorded in a fertilization plan. In this way, each grower can individually determine his optimal fertilizer dosage.
STEP 1 – Growing Cannabis indoors | The germination and growth phase
The time has come, the grow tent is ready and is sufficiently equipped. All the necessary utensils are now in supply. Now only high-quality cannabis seeds are needed and the grow can begin! From the very first moment, all the climatic conditions listed under point 4 should be created and continuously controlled.
- Germination: The cannabis seeds must be germinated. We have described exactly how this is best done in this article.
- Distance between lamp and plant: When using a 400 or 600-watt NDL, the distance should be between 50 and 60cm. If the distance is too small, burns can occur. On the other hand, if the distance is too far, the plants tend to grow long thin stalks and will collapse on themselves.
- Lighting times: For the germination and growth phase the following rule applies: 18/6, which means 18 hours of light and 6 hours of darkness. To prevent uncontrolled growth, this lighting time applies during the germination phase, even before the first sprout is visible. LED, LEC, and halogen lamps emit less heat than NDL lamps. This allows for less distance between the lamp and the plant, which allows for vigorous and healthy growth.
- Week 1 – 2: First plant shoots penetrate to the surface. They should be exposed to light ventilation from the beginning. This strengthens the cell structure of the plant and additionally prevents mold.
Regarding watering: The plants should be watered for the first time at the beginning of each light phase. The specifications for the quality of the water given in point 9 should be observed. The soil should always be kept moist, without fully submerging it. - Regarding watering: The plants should be watered for the first time at the beginning of each light phase. The requirements for the quality of the water specified under point 6 must be observed. The soil should always be kept moist without submerging it.
- Start of plant fertilization: In the first three weeks, you can still be cautious with the addition of fertilizers. A large part of the nutrients, such as nitrogen, phosphorus, and potassium, are provided by good soil mixes. Nevertheless, there are fertilizer components, such as root stimulators and growth stimulators, which can be added to the plant in the early stages as a liquid fertilizer or foliar spray. Less experienced growers are recommended to use a starter box offered by common fertilizer manufacturers. Regarding the quantities, the information of the respective manufacturer should be taken as a guideline. In either case, it is advisable to record everything in a fertilization plan!
- Repotting/transplanting: Approx. one week after the first plant shoot appeared, the plant should have developed the second pair of leaves. A strong root system should also have developed by now. At this point, you should re-pot the plant into a larger flower pot. Be careful, if the substrate around the seedling is too moist, there is a risk that parts of the root will break off. Therefore, the soil in the small pot should be slightly drier when transplanting to a new pot.
STEP 2 – Growing Cannabis Indoors | The flowering phase
Each grower makes his own decision when exactly he wants to have his cannabis plants bloom. The timing depends e.g. on the type of plant, the condition of the grow room, or simply the individual intentions of the grower.
For inexperienced growers, we recommend adjusting the right time to the space conditions of their grow room and the plant species. With a common grow tent of 1.80m or 2m height, Sativa heavy plants can be sent into flowering already in the 3rd week. At this time the plant is about 15cm – 20cm tall. During the flowering phase, the plant will then grow up to 3x as high. For indica dominant plants, the flowering phase tends to be initiated a week later.

- Inducing the flowering phase: By changing the light cycle from 18/6 to 12/12, i.e. 12hrs of light and 12hrs of darkness, we signal the plant that the days are getting shorter. This artificial late summer causes it to start flowering.
- Adapting fertilization: Change the fertilization scheme to bloom fertilization. Here again, the fertilizer manufacturer’s instructions should be taken as a guide.
- The flowering phase ranges from 50 to 90 days, depending on genetics. In addition to sticking to the fertilization schedule, fungus and mold prevention can be applied. Plant growth and foliage should be checked regularly for a healthy appearance. The reaction to the fertilizers should also be well observed.
- End of flowering phase: As you can see from our table of optimal water values in point 9, the plant must be flushed before harvesting. By flushing, we mean cleaning the root system of the plant, i.e. watering without adding nutrients. However, it is recommended to add cleaning support products to the water, as they remove mineral residues from the medium more quickly and thus give the harvested product a better aroma, flavor, and smoke feel. In addition, these products favor the hardening of the flowers during drying after harvesting.
STEP 3 – Growing Cannabis indoor | Harvest Time!
Everything is as good as done! If things have gone reasonably well so far, there are some thick and fragrant flowers covered with resin glands on the plants, which are heading for their ideal ripening point ready for harvesting. To ensure that nothing goes wrong or can be botched in any other way, we will list all the important steps for a successful harvest here.
When is the perfect moment to harvest?
When is cannabis harvested? Determining exactly when to harvest is probably the most important part of the entire harvest process. In most cases, the grower wants to harvest at the time when the THC content in the flowers of his plant is at its highest. In some cases, however, growers will voluntarily forgo a few percent and harvest their plants a little later in order to control the effect, or high, to their liking. By over-harvesting a little, the effect is more narcotic.
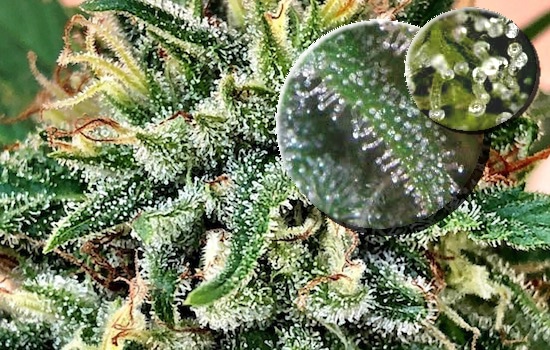
Regardless of when a grower prefers to harvest his cannabis plants, the right time can only be determined by good and close observation of the flowers. More specifically, the trichomes (resin glands of the plant) need to be observed. To better understand these trichomes and their optical changes, it is highly recommended to read our article on trichomes in cannabis plants!
The different coloration of the trichomes provides information about the current maturity status of the cannabis flower. If you are wondering how to best observe a cannabis flower, you are advised to buy a microscope, which is available for little money in specialized stores. No need to get too scientific now, only regular observation counts!
Harvesting your plants
After determining the optimal time for harvesting, the harvest can begin. First, the plant is cut off at the bottom of the stem, or if it went well, sawed off. Now it’s time to dry the flowers. There is the classic Dutch way, where the whole plant is simply hung upside down on a clothesline like a wet towel. Anyone who is not pressed for time, however, frees the plant from larger leaves with no resin beforehand.
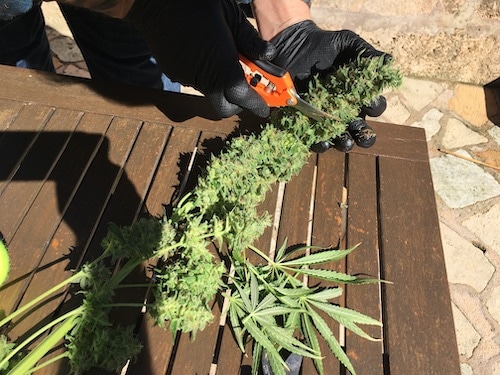
Another, very common method, is drying the flowers in; floor nets. In contrast to the Dutch variant, here the plant is freed from all branches and leaves before drying. Logically, here you need the appropriate nets, which are also available in specialized stores.
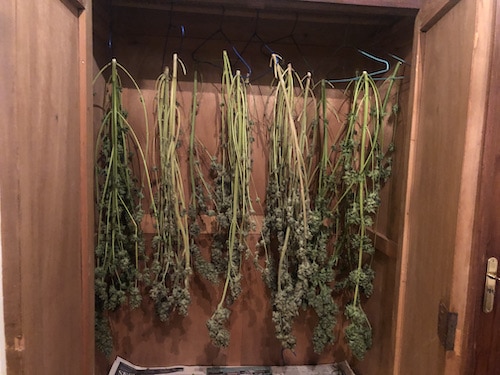
Before we start talking shop about which variant is better, we would like to talk briefly about the ideal room for drying flowers. A “drying chamber” should have the following properties:
- It should be dark because lack of light initiates the degradation of chlorophyll. This process is important because no one wants to rattle their lungs out of their throat when smoking
- Temperature, the standard rule, in this case, is; not below 15° and not above 30°
- Humidity must be regulated either by ventilation or a dehumidifier and should not exceed 50%.
- Odor development should also be taken into account. To prevent the project from blowing up in our faces in the last few meters, it is advisable to keep curious third parties away from the intense smell of the magic herb. For this purpose, we recommend a carbon or ozone filter. The use of industrial odor blockers, such as incense sticks, etc., is strongly discouraged. The flowers would adopt the aromatic substances, why that would be bad, probably does not require further explanation.
Let us now briefly return to the two common types of drying. The classic, Dutch variant, offers above all the advantage of saving time and is therefore particularly suitable for commercial cultivation.
The drying in nets, on the other hand, reduces the risk of mold, since the removal of biomaterial improves the air circulation around the flowers.
Drying takes an average of 7 – 14 days. Once the flowers feel like expected from a perfect flower, the drying process is over and we come to the ideal storage.
The ideal storage for cannabis flowers is generally the same as that of cigars.
If you would like to know how to germinate cannabis seeds, please read this article!